Table of Contents
Looking to impress your family and friends with a stunning dessert? This heart-shaped naked cake is not only visually appealing but also delicious and perfect for any special occasion. Using simple ingredients, this cake is easy to make and can be customized with your favorite fruits and cream. In this article, I’ll guide you through the step-by-step process to create this delightful dessert!
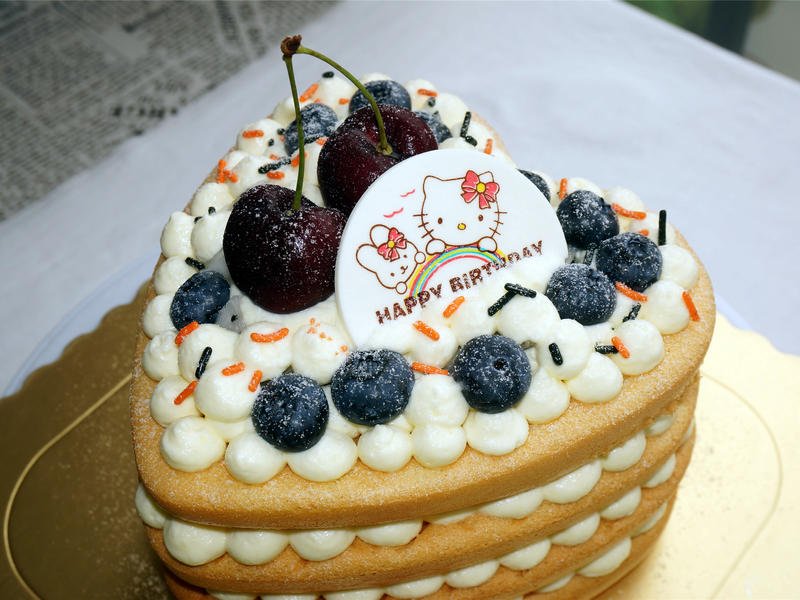
This heart-shaped naked cake is made with fluffy sponge cake, whipped cream, and fresh fruits, perfect for love-filled celebrations!
Step 1: Prepare the Egg Yolk Mixture
In a mixing bowl, combine the egg yolks, corn oil, water, salt, and 20g of granulated sugar. Mix well until the ingredients are fully incorporated.

Step 2: Add the Flour
Sift the cake flour into the egg yolk mixture. Stir until the mixture is smooth and free of lumps. Set it aside for later use.


Step 3: Beat the Egg Whites
In a separate bowl, beat the egg whites while gradually adding the remaining 50g of granulated sugar. Continue whisking until stiff peaks form. This will give the cake a light and airy texture.

Step 4: Combine Mixtures
Gently fold the whipped egg whites into the egg yolk mixture. Use a cutting motion to combine them without deflating the egg whites.

Step 5: Pour into Molds
Divide the batter evenly among five 6-inch heart-shaped molds. Tap the molds lightly on the counter to release any large air bubbles that may have formed.

Step 6: Bake the Heart Cake
Preheat the oven to 175°C (350°F). Bake in the middle of the oven for 15 minutes. Then, increase the temperature to 200°C (392°F) for another 5 minutes to achieve a golden color. While the cakes are baking, whip the heavy cream with 40g of sugar until stiff peaks form.
Step 7: Cool the Heart Cake
Once baked, remove the cakes from the oven and invert them onto a cooling rack to cool completely.


Step 8: Prepare the Fruits
Meanwhile, wash the blueberries and cherries. Cut the dragon fruit into small pieces and set them aside for decoration.
Step 9: Assemble the Heart Cake
Place the first cake layer on a serving plate, facing up. Pipe small dollops of whipped cream on top, creating a decorative pattern.

Step 10: Add the Fruits
Arrange the dragon fruit pieces within the dollops of whipped cream, ensuring they are placed just inside the edge of the cake.
Step 11: Repeat and Decorate
Repeat the layering process with the remaining cake layers, using blueberries and cherries for the final decoration. Finish by sprinkling a bit of edible sugar beads and powdered sugar over the top for added sweetness and texture.

Step 12: Optional Box Cake
If you have leftover cake and fruits, you can create an additional box-style cake using the remaining ingredients and cream for an extra treat!
FAQ
Can I make this cake in advance?
Yes, you can prepare the cake layers a day in advance and assemble them just before serving.
What fruits can I use for decoration?
Feel free to use any seasonal fruits you like! Strawberries, raspberries, and kiwi are great alternatives.
How should I store the naked cake?
Store the naked cake in the refrigerator and consume it within 2-3 days for the best flavor and texture.
Conclusion
Creating a heart-shaped naked cake is a wonderful way to celebrate special moments. This recipe combines fluffy cake layers with fresh fruits and whipped cream, making every bite a delight. Give it a try for your next celebration or simply to indulge your sweet tooth! For more delicious recipes, be sure to check out my other baking creations!